6th December 2021
Timestream is AWS’s stab at creating a scalable data store for time series data. Opinions on the service are mixed to say the least and its performance compared with a single instance of TimescaleDB is surprisingly poor. AWS is very good at enhancing their products in the months and years after release, so if you (like me) have a use case for a low to medium traffic service which has a low entry cost and requires minimal setup and ongoing maintenance it’s worth a look. AWS recently (last month?) added support for scheduled queries which can read from one of your tables and write out to another. You might want to do this to create a summarised table every day (or hour! Or minute!) which will be cheaper when your users (or BI platform) queries it than the raw data would be. There is a familiar step-by-step wizard process to complete to create the scheduled query in the console but a few gotchas might hold you up. One required step is to select an execution role which Timestream will assume in order to run your query. Unfortunately no advice is given as to how this role should be designed, other than this:
The role must have permissions to read data from the source tables, write data to the destination table, and send notifications to the SNS queue.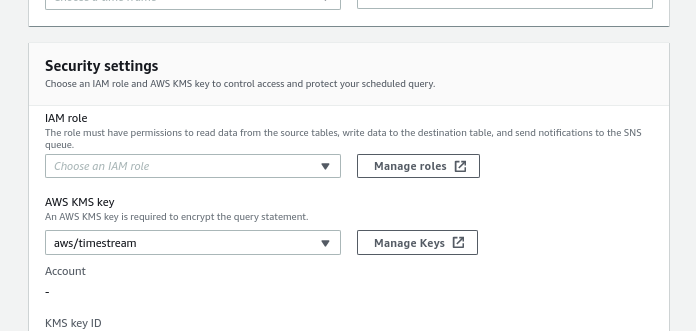
Not much to go on! If you go ahead and create a role, even if you attach all the required permissions first time, you won’t be allowed to save your Scheduled Query and an error like this will be returned:
Timestream is not authorized to do `sts:assumeRole` for given execution role: arn:aws:iam::123456789098:role/TimestreamScheduledQueryRunHere are the steps to create a role which will allow you to get past this point.
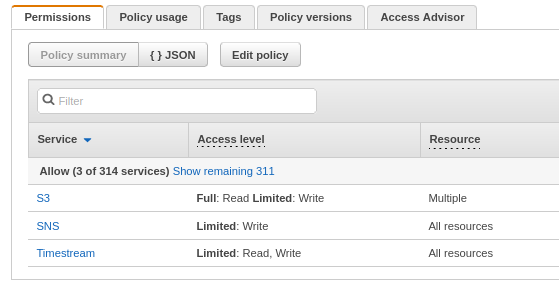
Go to the IAM policy editor and create a policy with those mentioned permissions and also S3 Put Object permissions for the bucket you want Timestream to write to.
When you’re finished it might look like this:
Now you can create a role which uses this policy. Head over to the Roles section of IAM and click ‘Create Role’. You’ll see that there are no use cases for Timestream, so for the moment select Lambda, hit Next and select your new policy to attach it, then Next again to name the Role. I chose TimestreamScheduledQueryRole as the name of mine.
We now have a new role, but we also have a problem, because this one is only authorised for use by the Lambda. We need to change the service principle that this role trusts. On the summary page for your new role, click the Trust relationships tab and edit it, changing lambda.amazonaws.com to timestream.amazonaws.com and saving it, so that it looks like this:

Back in your Timestream setup, you should now be able to refresh the wizard page to put your new role in the list (there is no refresh button by the field yet).
Complete the other fields and you should be able to complete the rest of the wizard, creating your new Scheduled Query. At this time, it’s impossible to edit a Scheduled Query, so do check it all carefully (including the query itself) before saving.
If you’re using the CLI or API to create Scheduled Queries, your new role should be provided in the ScheduledQueryExecutionRoleArn parameter.
I hope this has been useful – it may have no relevance in a few weeks if AWS updates the service but finding this would certainly have helped me and saved some time today. Let me know how you get on in the comments.